
Summary
This article will summarize the Customer Tab, which allows you to customize how you define, organize, and communicate with your customers in ServiceBox. The Customer Tab includes the following subsections: Categories, Custom Fields, Contact Types, Service Reminders, and Portal Intake Form, all of which are detailed below.
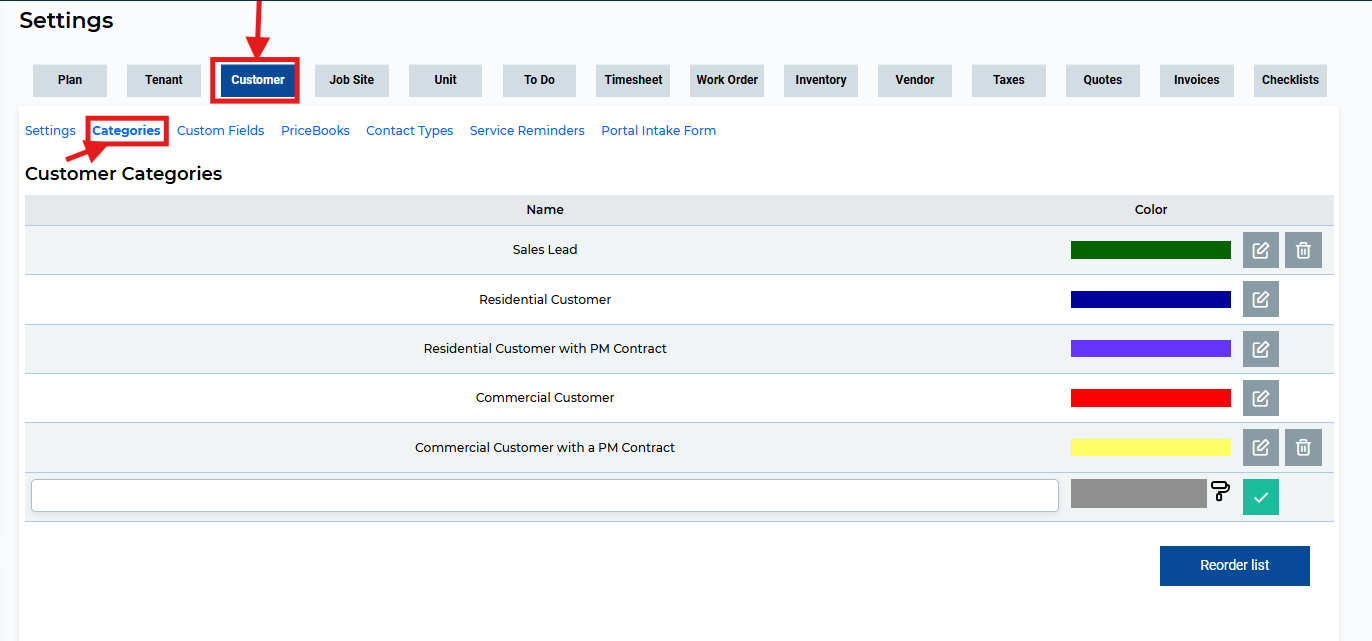
Customer Tab: Categories
The Categories subsection allows you to group customers into categories, which can be color-coded for easy identification in your customer list. Example categories include Residential, Commercial, and Maintenance Contracts.
Note: Categories in use (i.e., assigned to customers) cannot be deleted. You will only see the delete option for unused categories.
Customer Tab: Custom Fields
Use Custom Fields to capture additional, company-specific information about your customers. For example, you can add a field to collect a customer's middle name.
If you would like to include additional fields in the "Create New Customer" page, go to the Custom Fields subsection within the Customer Tab. For example, in the following screenshot, a Custom Field has been created to include the customer's Middle Name.

After creating a Custom Field for a "Middle Name", if you hover your cursor over "New" at the top of your ServiceBox screen and select "Customer" from the dropdown menu, you will notice the Custom Field has been added as an Information Box when adding new customer profiles.
Each custom field requires a Name and a Type, such as:
-
Multi-Line Text
-
Single Line Text
-
Dropdown / Multi-Select
-
Checkbox
-
Date
-
Restricted Dropdown / Restricted Multi-Select
Settings for Custom Fields:
-
Restricted: Visible to administrators only
-
Display on Work Order: Shows the field on work orders
-
Print on Work Order: Prints the field on the work order document
Once saved, your new custom field will appear on all future “Create New Customer” forms.
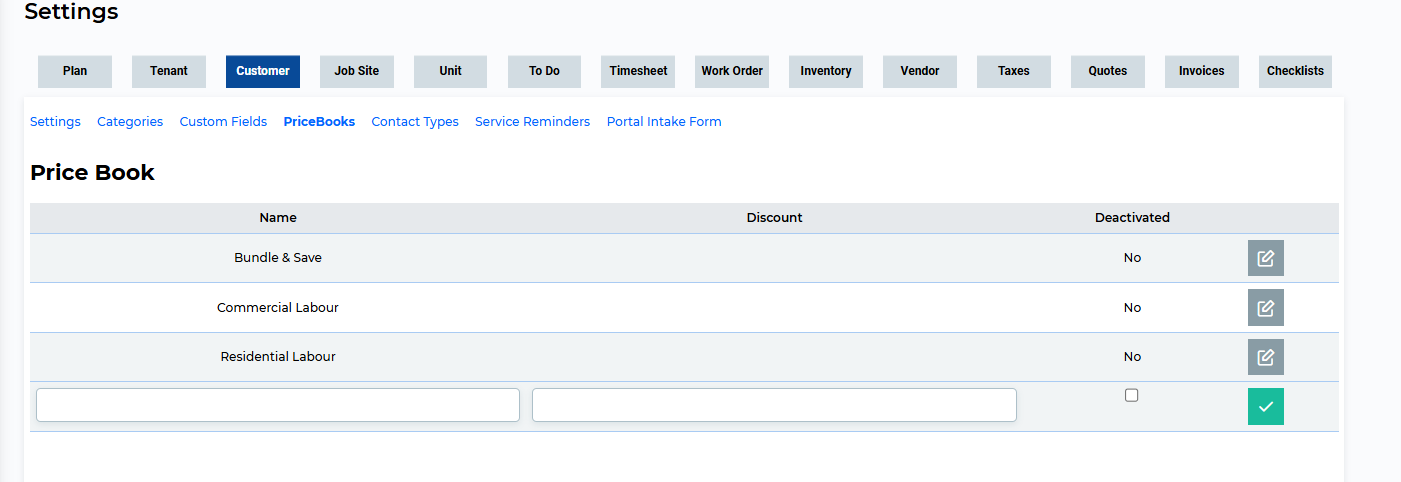
Customer Tab: Price Books
Use this subsection to create custom PriceBooks that apply specific pricing to customers or job sites. Just name the PriceBook and apply a discount if needed. Then assign it to one or more customers or sites.
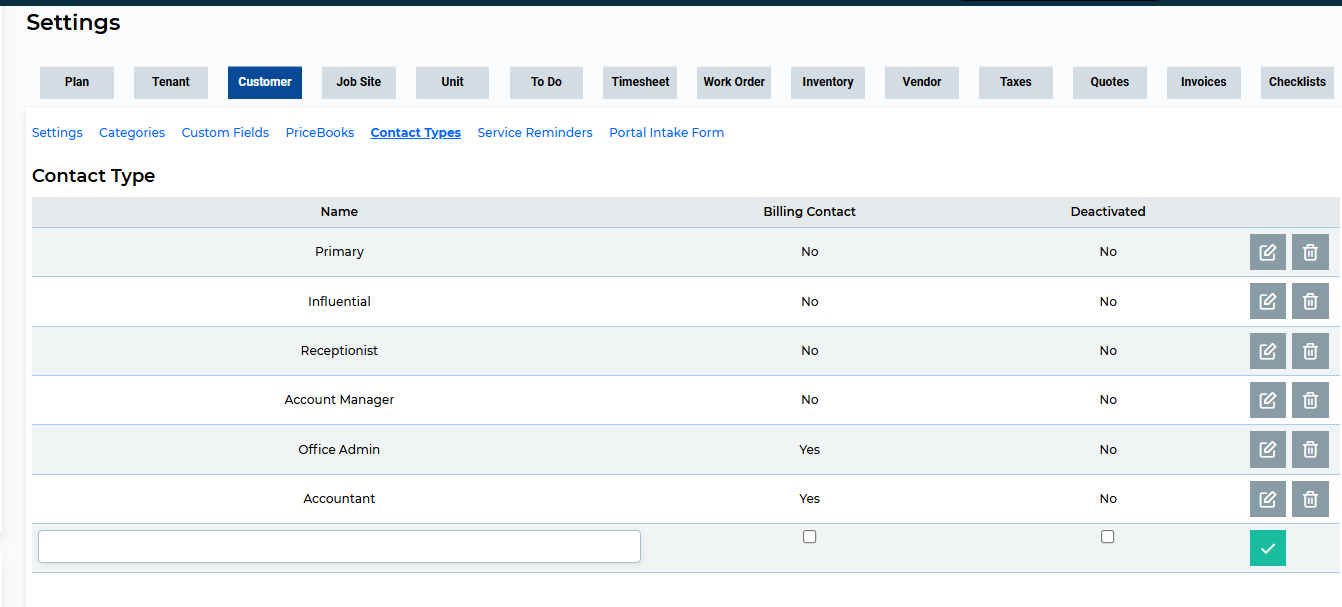
Customer Tab: Contact Types
The Contact Types subsection lets you define roles for individuals connected to a company (e.g., Primary Contact, Advisor, Billing, Receptionist). This is useful when multiple contacts are linked to the same customer profile.
Click here for more information regarding your Contacts page.
Customer Tab: Service Reminders
Note: This feature must be enabled by the ServiceBox support team. Contact support if you don’t see this tab.
Use Service Reminders to schedule automatic emails sent to customers ahead of a recurring service. Define how many months before the service date to send the reminder, and customize the sender name, email, subject line, and message body.

Customer Tab: Portal Intake Form
Check out this article for details on how to use the portal intake form on your website.
This feature allows you to embed a customer intake form on your website. When a customer fills out the form, ServiceBox will automatically create a customer profile and generate a corresponding To Do.
NOTE: You can use the full html link at the top of this page, with the iframe (which is unique for each site). This will allow you to embed a form in your website.
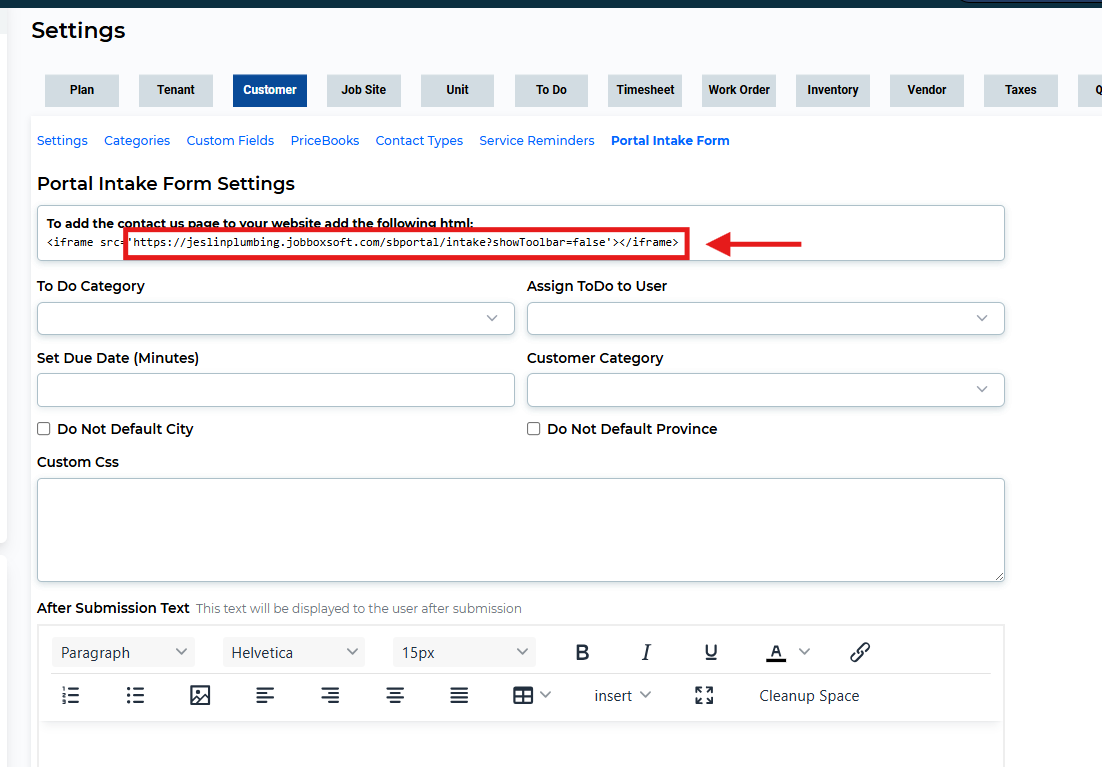
Here is a list of customizable features of the Portal Intake Form subsection:
- To Do Category:
- This dropdown menu contains the list of all the To-Do categories you have created within the settings of your To-Do tab. Select the To Do category to which you'd like the customer's submitted request assigned.
- Assign To Do to User:
- This dropdown list contains a list of all your ServiceBox users. You must select the user you want to be assigned the To Do created by the customer's submission.
- Set Due Date:
- This will allow you to set the due date in minutes for the system.
- Customer Category:
- This dropdown menu contains the list of all the Customer categories you have created within the "Categories" subsection of your Customer tab. Select the Customer category to which you'd like the customer's submitted request assigned.
- Custom CSS:
- CSS (or Cascading Style Sheets) is the technology that will allow you to create a visually engaging webform, including aspects such as the layout, colours, and fonts, by overriding the default template. This is useful for companies that want the style of their form to match the rest of their website.
- After Submission Text:
- This text will be displayed to the user after submission. For example: "THANK YOU FOR YOUR SUBMISSION, WE WILL CONTACT YOU SOON!"
- Email Acknowledgment:
- After your customer completes and submits the form, ServiceBox will send an email acknowledging receipt of their request. This section allows you to input the Name and Email(s) from which the acknowledgment is sent, a subject line for the email, and the body text of the email.
After customizing your Portal Intake Form, click save, and the form will be ready to be embedded in your website.
Need Help?
If you have any questions or need support, please click the Help button in your ServiceBox account or email us at support@getservicebox.com.