
Introduction
Efficient synchronization between ServiceBox and QuickBooks Desktop ensures accurate financial records, especially for tracking invoice payment statuses. This article outlines how to ensure payments recorded in QuickBooks Desktop are reflected as "Paid" in ServiceBox.
Step-by-Step Guide
Step 1: Running the sync
Initiate the synchronization process promptly after receiving payments in QuickBooks Desktop. This action ensures that the status of the invoice is updated to "Paid" in ServiceBox.
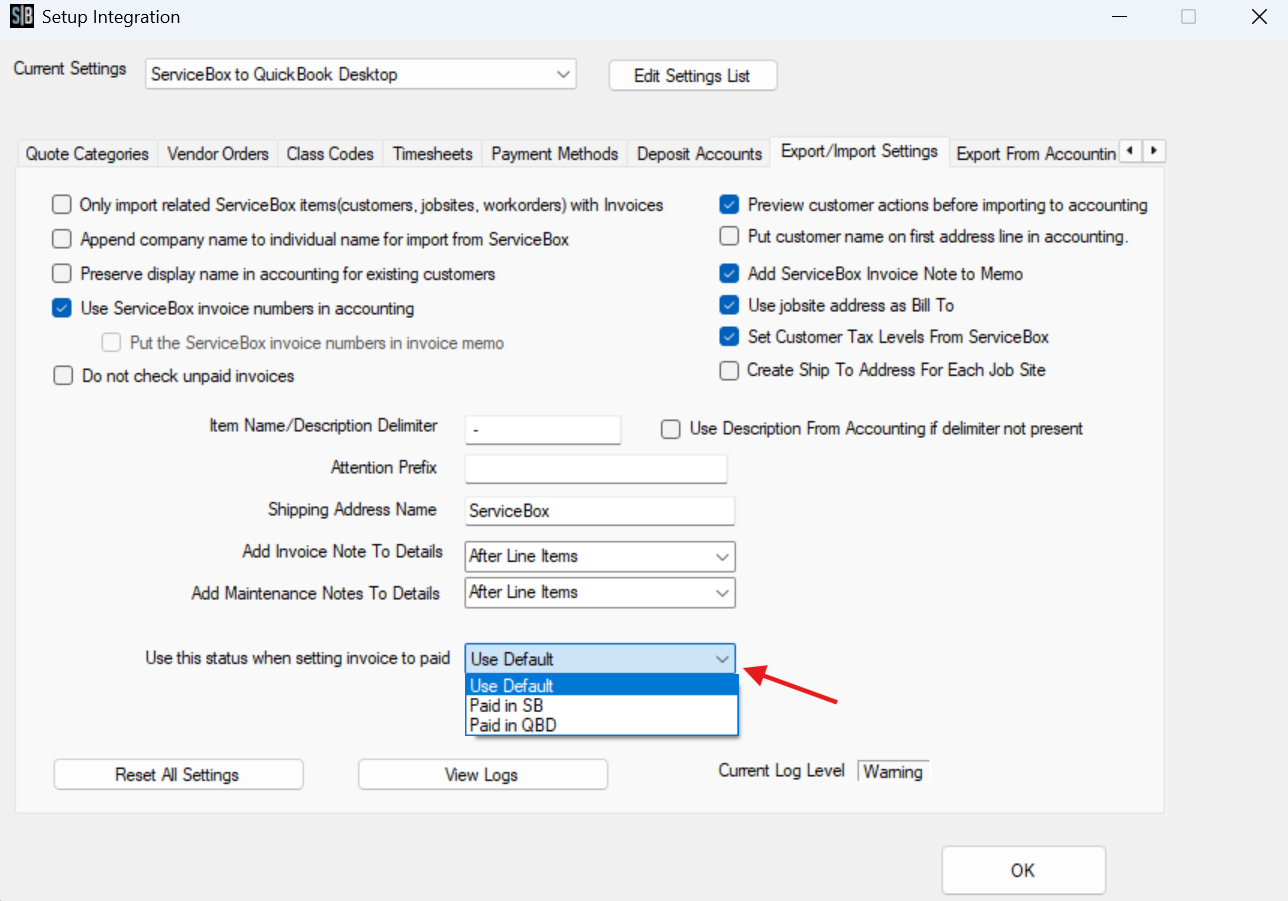
Step 2: Adjust Export/Import settings within the Connector program
If necessary, modify the Export/Import settings within the Connector Program. Opt for "Paid" from the dropdown menu under "Use this status when setting invoice to paid."
While this setting typically doesn’t affect sync results, adjusting it can help maintain consistency and prevent potential issues.

Step 3: Add Statuses
For clearer management, consider adding a specific status in ServiceBox dedicated to invoices paid in QuickBooks Desktop. Here's how to do it:
- Go to Settings > Invoices > Statuses
- Click Add and enter a status like "Paid in QuickBooks Desktop."
- Check the Paid checkbox to ensure ServiceBox treats it as a paid status
- Click the green checkmark to save

After creating this status, return to the Connector Program and select "Use Default" under “Use this status when setting invoice to paid.” This ensures the system recognizes any status with the “Paid” flag enabled.
Need Help?
If you have any questions or need support, please click the Help button in your ServiceBox account or email us at support@getservicebox.com.