
Summary
We’ve found that many customers need the ability to apply different prices for items in ServiceBox. To meet this need, we’ve developed a feature called Pricebook that allows you to create custom price lists and assign them to specific customers or job sites. This article explains how the Pricebook feature works.
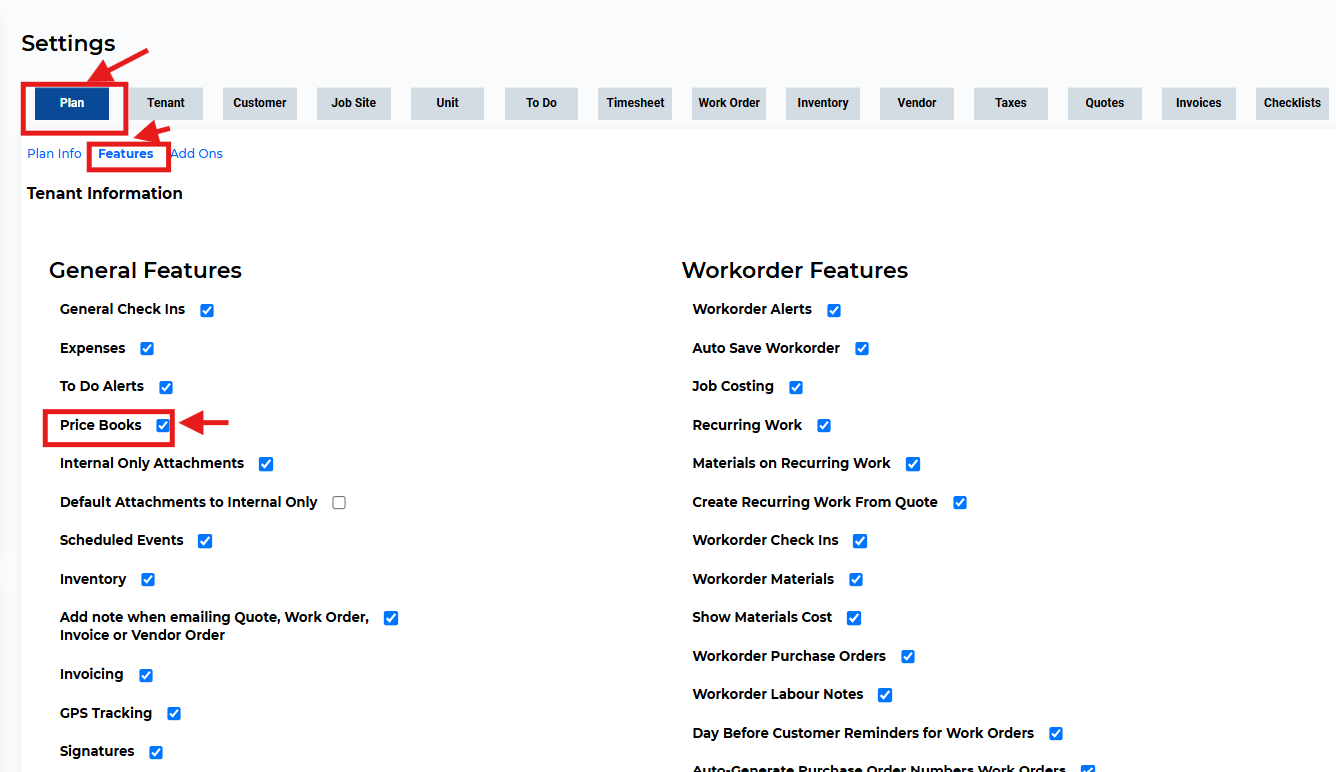
To enable Pricebook, go to Settings → Plan → Features and check the Price Book box.
Creating a New Pricebook
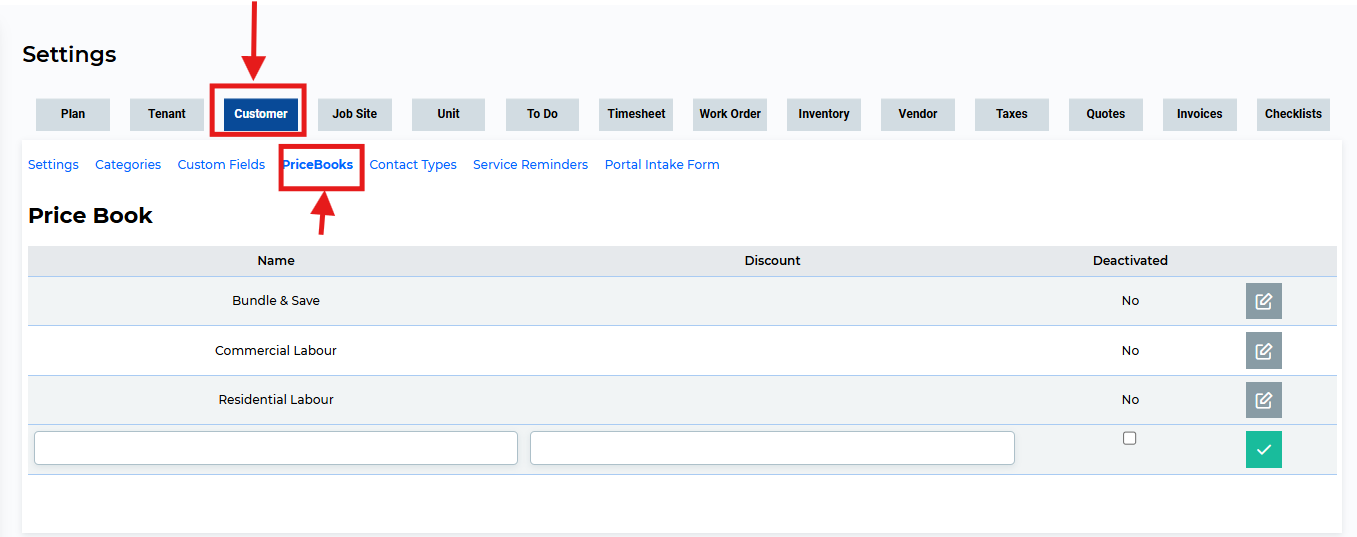
A Pricebook can be created or edited under Settings → Customer → PriceBooks. To create a new Pricebook, enter a name and save it. This Pricebook can then be assigned to one or more customers or job sites. If needed, you can return to this screen to rename the Pricebook later.
If you want to assign a discount percentage to the full invoice amount, enter the percentage in the Discount box before saving. If you only want to adjust pricing for certain labour or materials, leave the discount box blank.
Adjusting Pricebook Items
Once a Pricebook is created, you can adjust its item pricing. The Pricebook system adds unit cost and markup values on top of your default item list, allowing you to maintain unique pricing for specific customers or job sites.
To edit Pricebook items, go to Settings → Quotes → Quote Items or Settings → Invoices → Invoice Items. Use the Edit Price Book dropdown to select the Pricebook you want to update.
Note: Items must be added to the default price list first. You cannot add a brand-new item directly to a Pricebook.
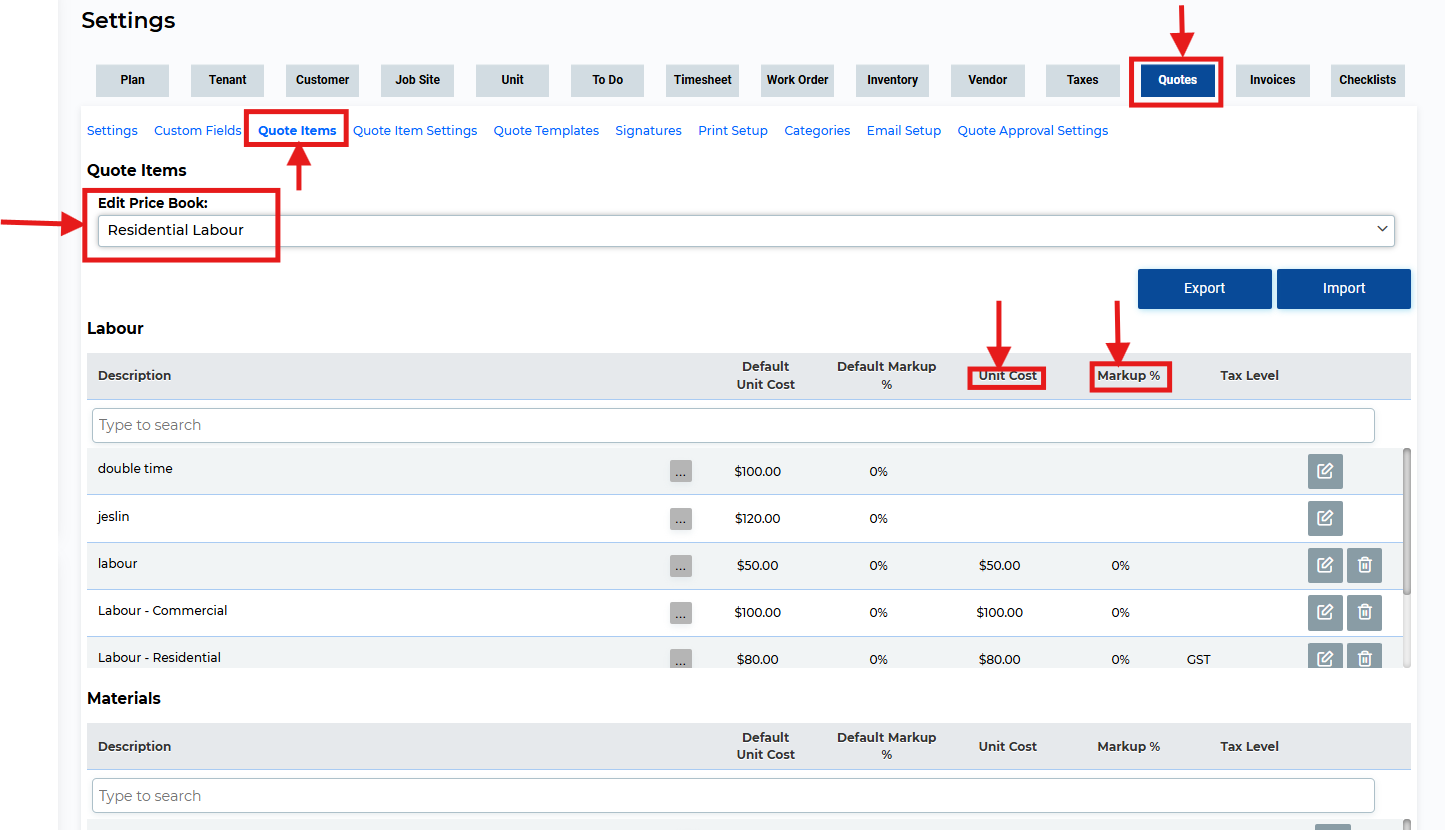
Once the Pricebook is selected, you’ll see new columns for the Pricebook’s unit cost and markup. Click the pencil icon to edit the values. These changes apply only to the selected Pricebook and do not affect the default pricing. You can add and edit items for a Pricebook from this screen.
Pricebook Update Settings
We have included some unique settings for the way Pricebooks are updated and items added for Pricebook related customers. Depending on how your ServiceBox site is configured you may need to have unique settings for both Quotes and Invoice items.
To review them, go to:
-
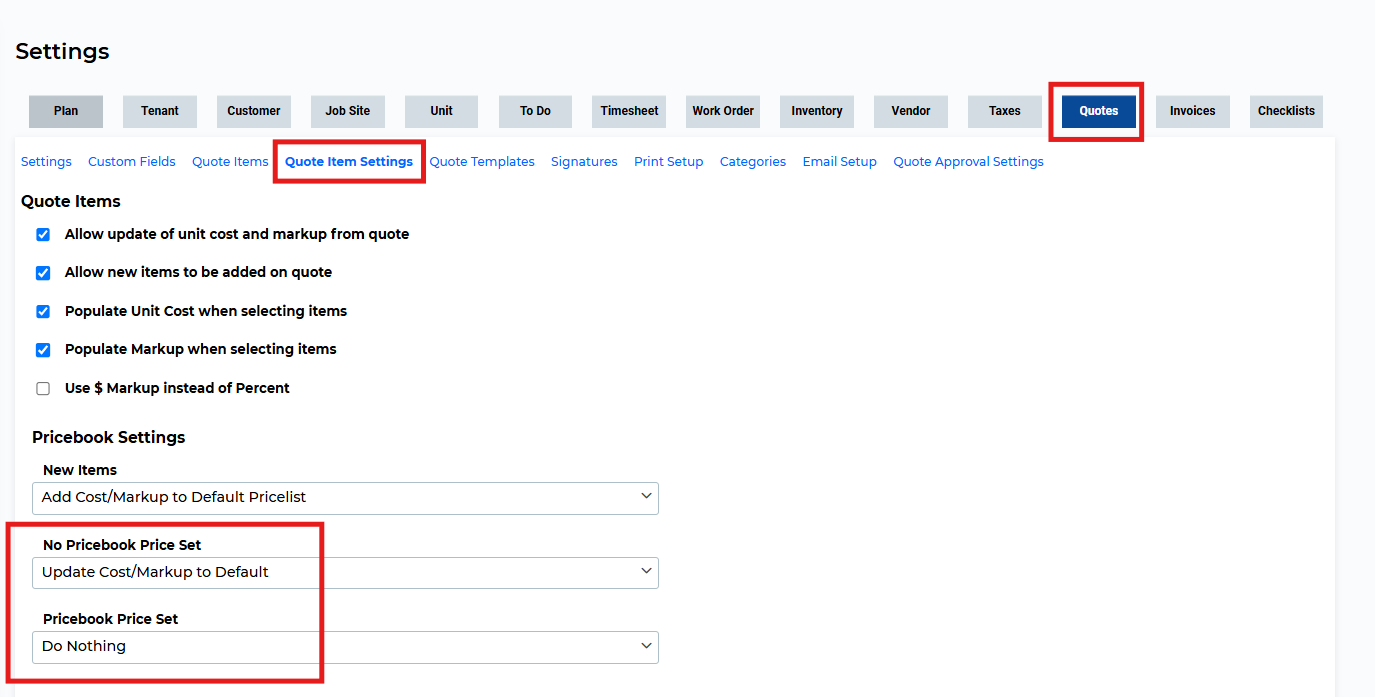
Settings → Quotes → Quote Item Settings
-
Settings → Invoices → Invoice Item Settings
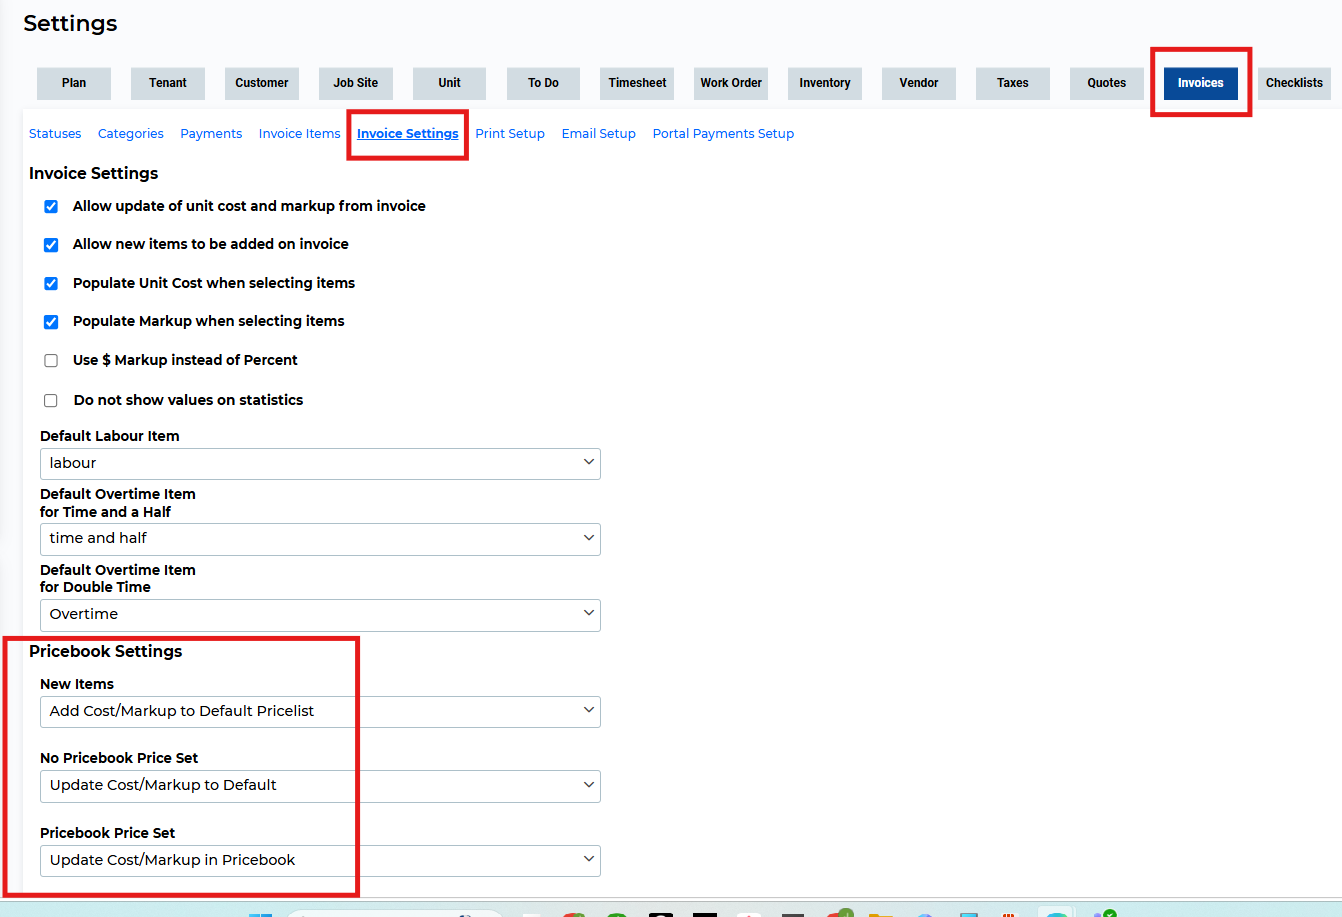
The Pricebook utilizes the settings under the "Quote Items" or "Invoice Items" heading. So if you want to be able to add or update items from the Quote or Invoice, then these settings need to be turned on. If they are turned off then the Pricebook settings will not be used. The settings for both sections is the same. Once you enable the Pricebooks feature you will see the following settings:
These settings only apply to customers or job sites that have a Pricebook assigned. They also only take effect if “Add or Update Items from Quote/Invoice” is enabled.
Once enabled, the following options become available:
New Items (not in the default price list):
-
Add Cost/Markup to Default Pricelist (default): Adds the item to the default list with pricing.
-
Add Cost/Markup to the Pricebook: Adds the item to the default list but sets default pricing to zero. Pricing is entered only in the selected Pricebook.
No Pricebook Price Set (item exists in default list but not in selected Pricebook):
-
Add Cost/Markup to the Pricebook: Adds pricing to the selected Pricebook only.
-
Update Cost/Markup to the Default (default): Updates pricing in the default list.
Pricebook Price Set (item has Pricebook pricing already):
-
Do Nothing: Leaves current Pricebook pricing unchanged.
-
Update Cost/Markup in Pricebook: Updates the pricing in the selected Pricebook.
Applying a Pricebook to a Customer
Once your Pricebook and item pricing are set up, you can assign it to a customer. Open the Customer profile, click Edit, and use the Pricebook dropdown to select the desired Pricebook. Click Save.

All quotes and invoices for that customer will now use the assigned Pricebook. The selected Pricebook will also appear on the customer’s detail screen.
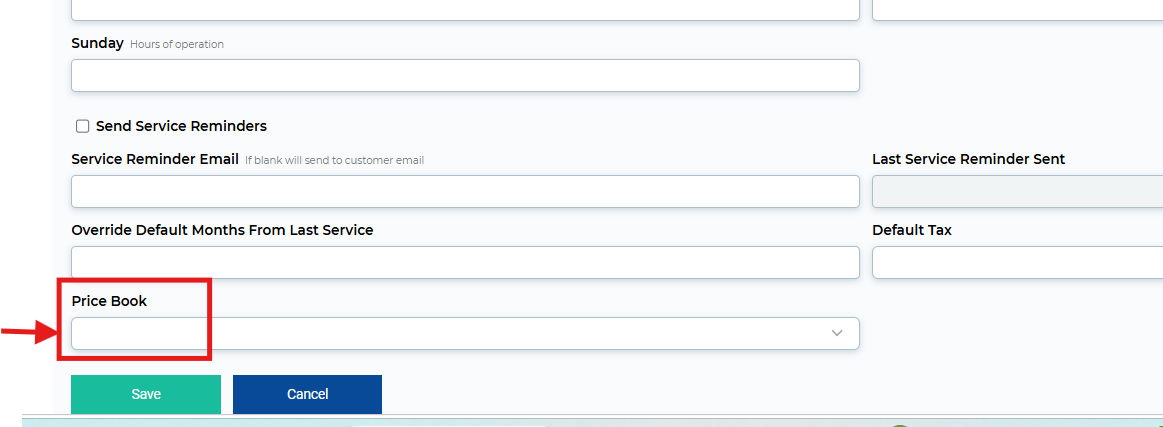
Applying a Pricebook to a Job Site
You can also assign a Pricebook directly to a job site. Open the Job Site profile, click Edit, and select the desired Pricebook from the dropdown. Click Save.
If both a customer and a job site have Pricebooks assigned, the Job Site’s Pricebook takes priority. The selected Pricebook will also display on the job site’s detail screen.
Using a Pricebook in a Quote
When a customer or job site has a Pricebook, that Pricebook will automatically apply to items added to their quotes. If only a few items are adjusted in the Pricebook, those items will use the new pricing, while all others will fall back to the default pricing.
When viewing the Calculator tab in the quote, you will see which Pricebook is being used.
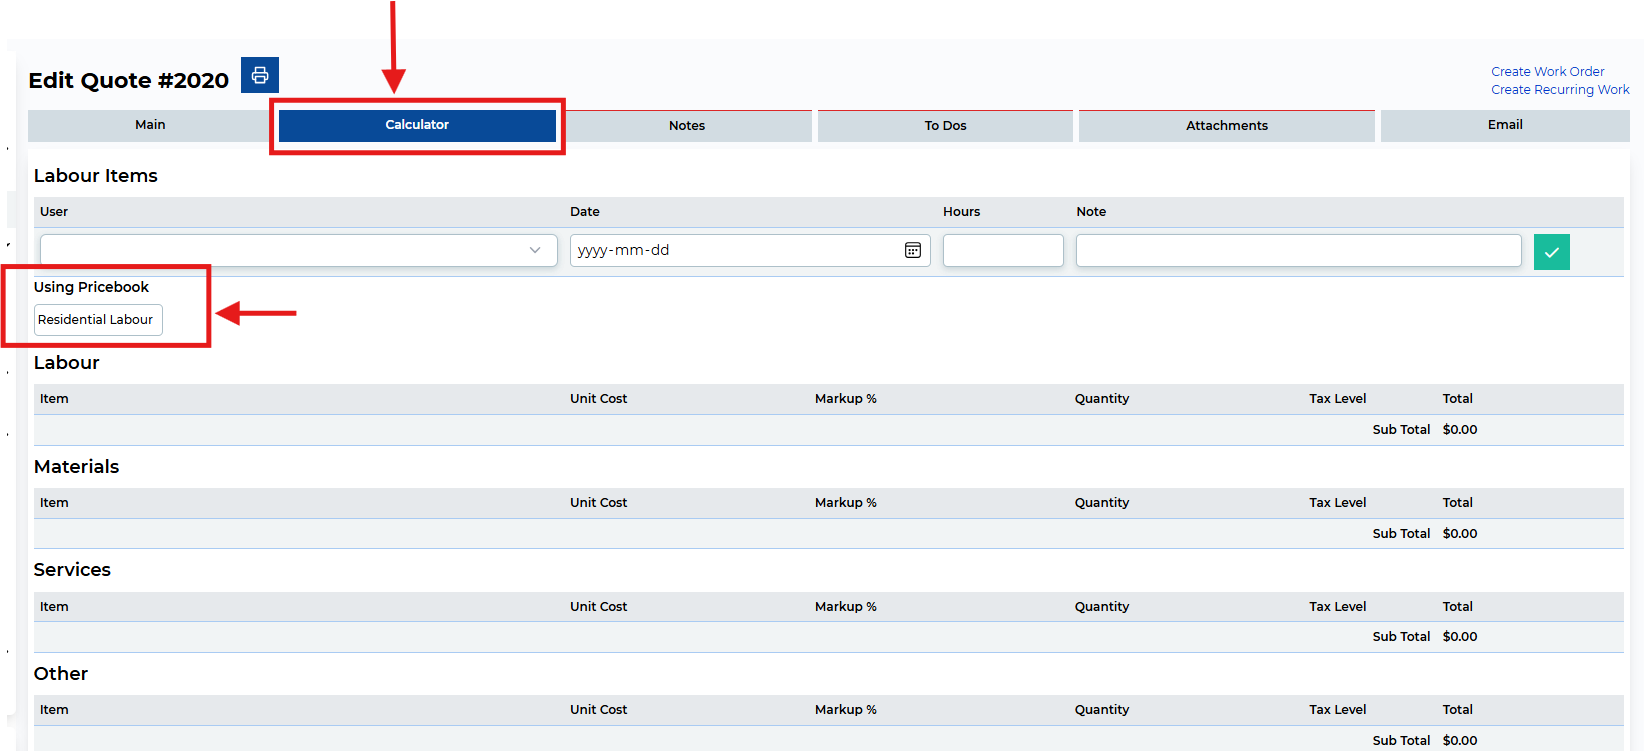
At this point you can modify the Quote and add items as you normally would.
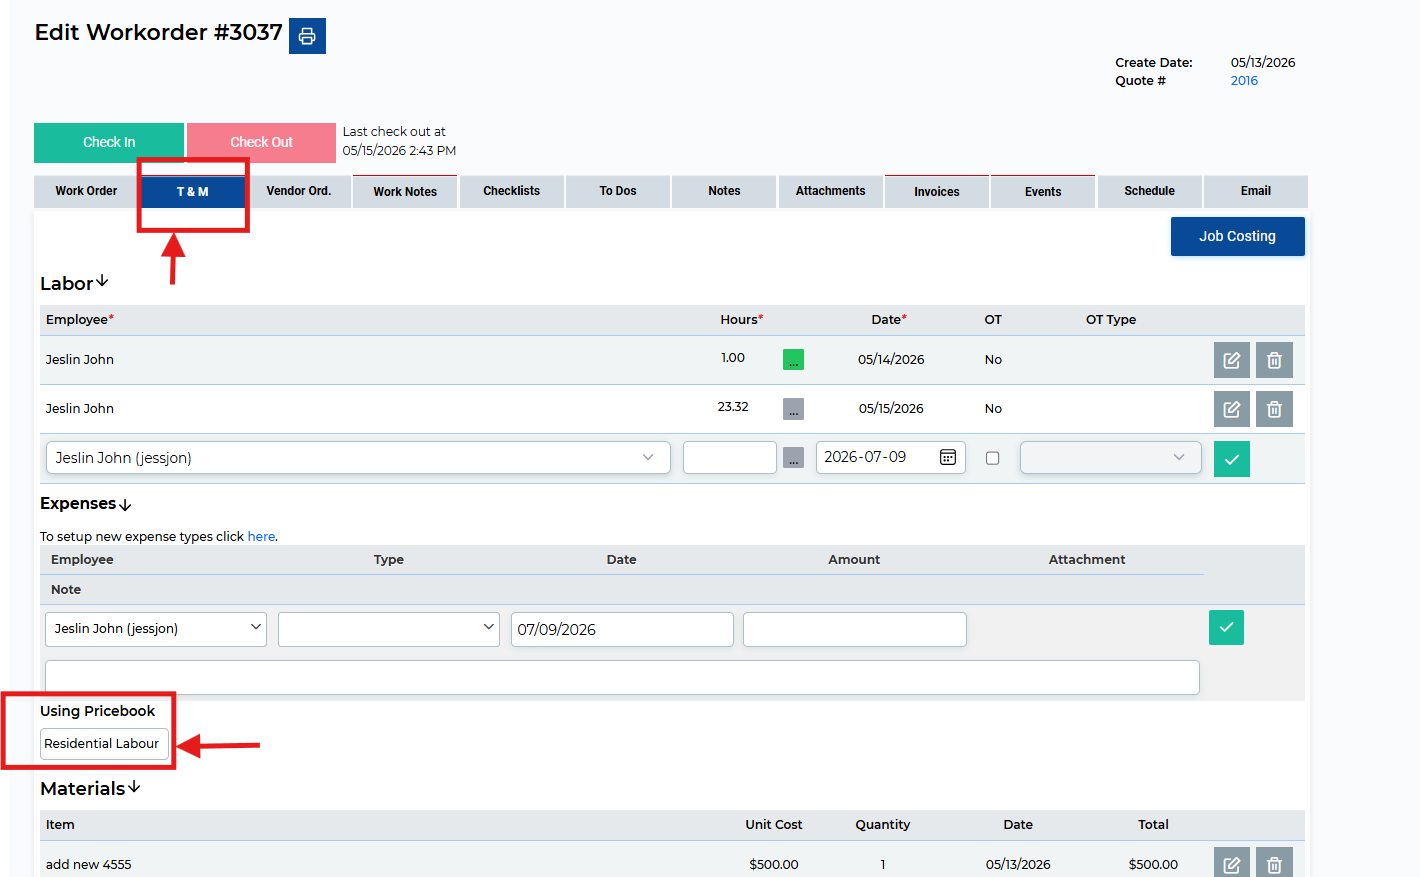
Using a Pricebook in a Work Order
If the customer or job site linked to the work order has a Pricebook assigned—and if you’ve enabled the ability to view unit costs in work orders—you will see which Pricebook is being used. The work order view will reflect the unit costs from the selected Pricebook.
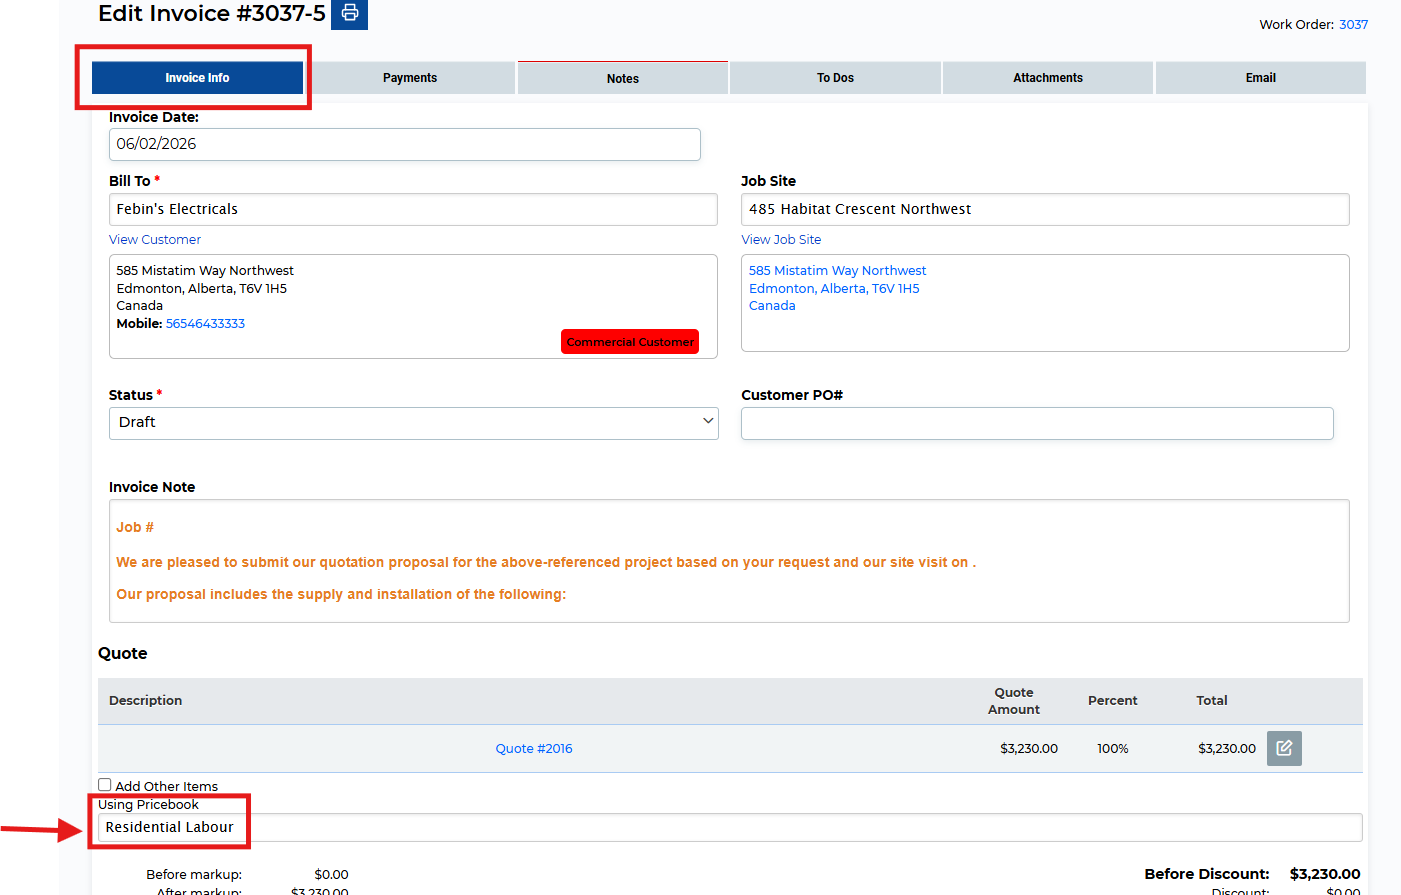
Using a Pricebook in an Invoice
When creating a Time and Materials or Blank Invoice for a customer or job site with a Pricebook assigned, all imported values will be adjusted according to that Pricebook.
This is particularly useful when customers have custom labor rates. For example, suppose your default labor item has a unit cost of $80/hour and a 0% markup. If a particular customer has a discounted rate of $65/hour, you can create a Pricebook with the adjusted value and assign it to that customer. Now, all invoices for that customer will automatically pull in the $65/hour rate for labor.
As with quotes, you’ll see the active Pricebook in the Using Pricebook field on the invoice.
Note: The Pricebook does not impact the syncing of invoices to your accounting software.
Need Help?
If you have any questions or need support, please click the Help button in your ServiceBox account or email us at support@getservicebox.com.