
Summary
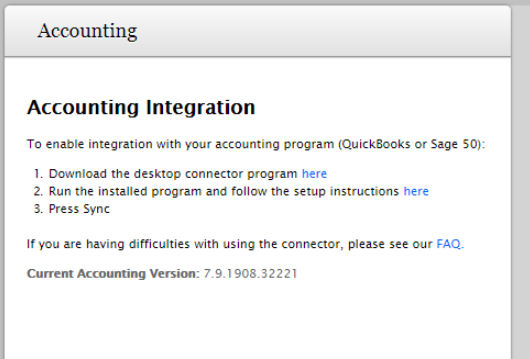
To download the accounting connector, simply click on the Accounting menu item under your username. The link to the connector is in the first bullet point. Once you've downloaded and run the application, here's how to set it up:
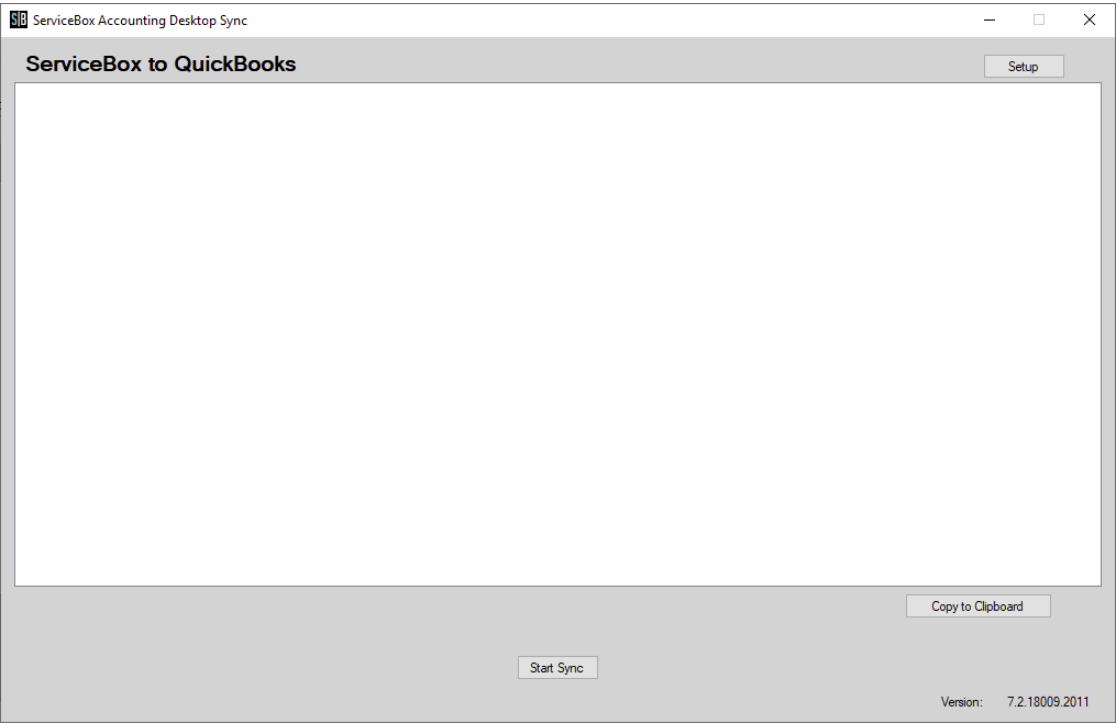
1. Launch the Connector
The first screen you will encounter is the main screen for the connector.
From here, click the Setup button at the top right.
The setup screen should now be displayed:

2. Connection Setup
The Setup screen should now be displayed. Along the top of the window, there are a series of tabs. Fields in yellow are required and not yet completed.
ServiceBox Connection
-
In the Connection tab, type in your ServiceBox URL (e.g.,
yourcompany.jobboxsoft.com/ServiceBox— do not includehttps://). -
Enter your User ID and Password.
-
Click Test to verify the connection.
Accounting System Connection
-
Select your software: QuickBooks or Sage (only installed software will appear).
-
Select the company file to connect to.
-
QuickBooks users: setup is complete here.
-
Sage users: also enter the username and password for the Sage profile.
-
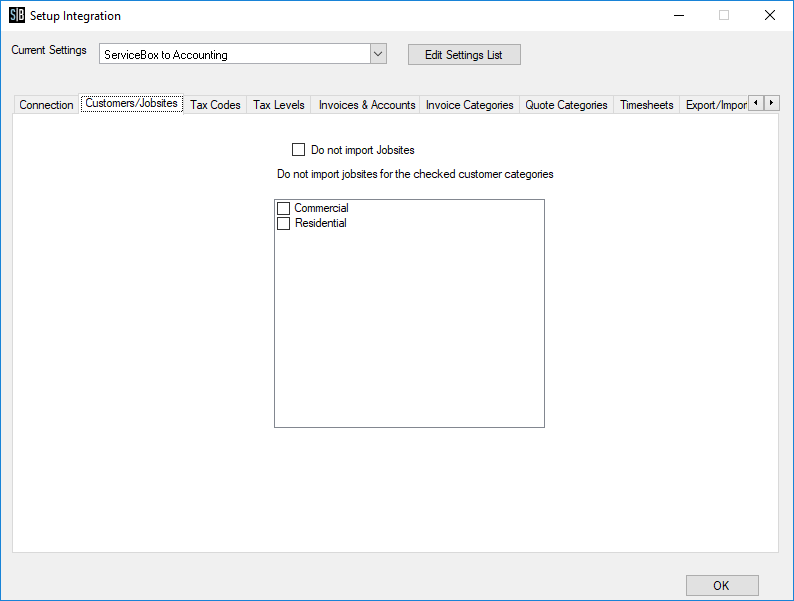
3. Customers / Job Sites Tab
By default, all job sites will import from ServiceBox to your accounting program.
Options:
-
Check Do not import Jobsites to prevent syncing job sites.
-
You can also choose to exclude Residential or Commercial job sites.
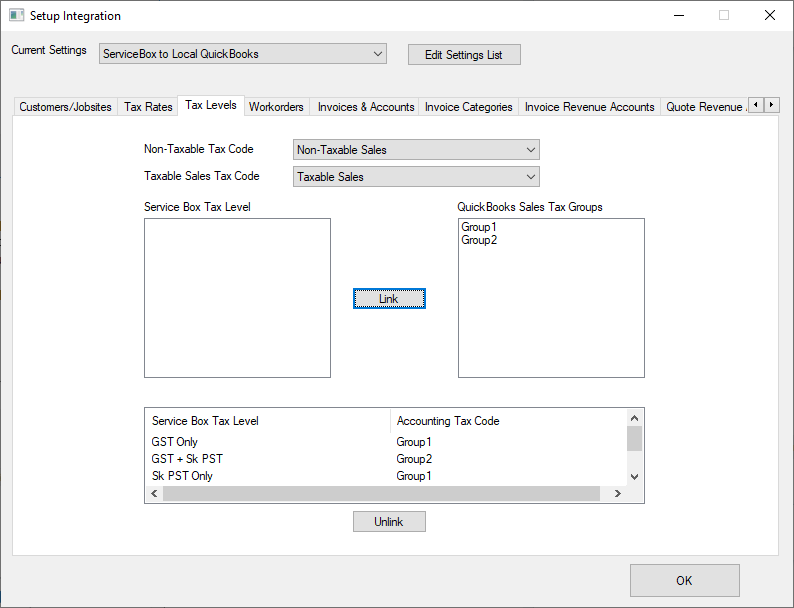
4. Tax Code Mapping
The connector needs to map ServiceBox tax levels to your accounting tax codes.
-
Select a default tax to apply when no tax is selected on the invoice.
-
Use the dual lists to link ServiceBox tax levels to accounting tax codes:
-
Select one from each list and click Link.
-
Linked items appear in the bottom list.
-
Click Unlink to remove.
-
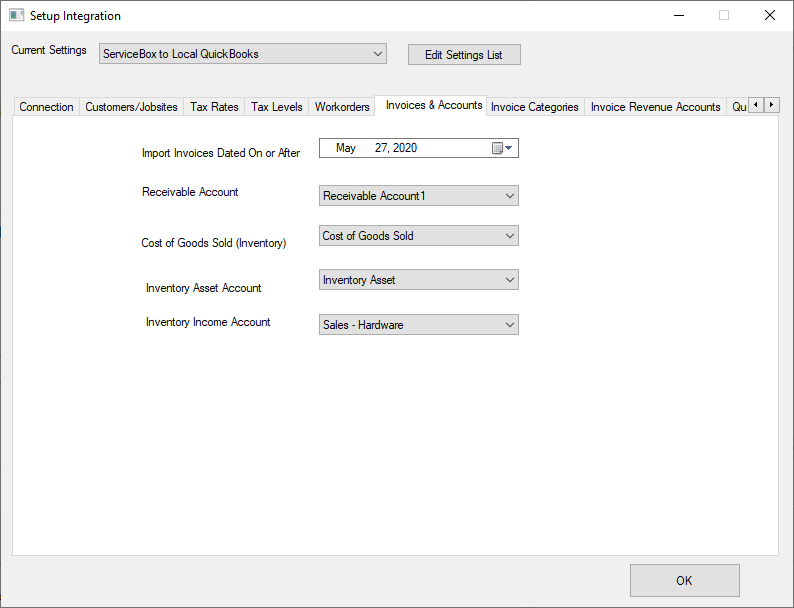
5. Import Date & Default Accounts
Use this tab to set:
-
The start date for importing invoices (prevents duplicate entry).
-
The default revenue account and receivables account for invoice imports.
Note: If an item already exists in accounting with the same description, that item (and its revenue account) will be used instead of creating a new one.
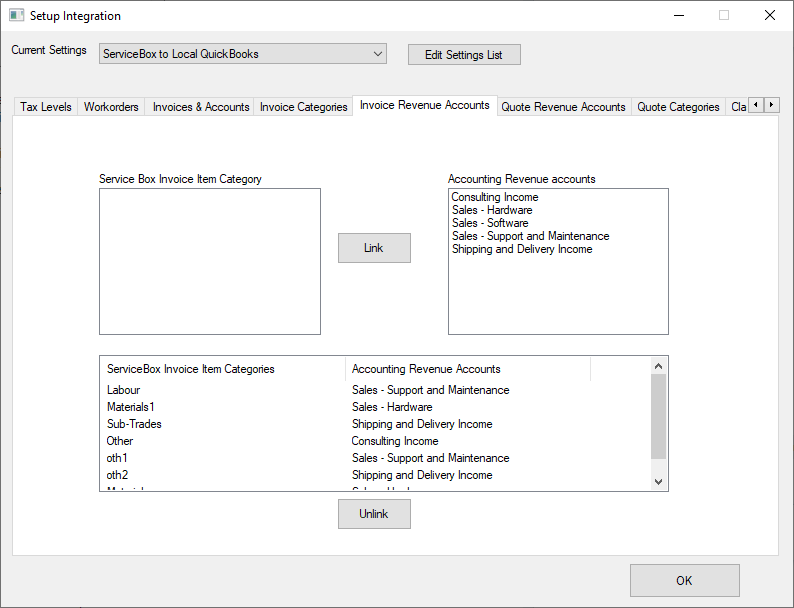
6. QuickBooks Only – Invoice Category Mapping
The connector creates new items in QuickBooks if none match existing descriptions.
-
Use the Invoice Categories and Invoice Revenue Accounts tabs to link ServiceBox invoice categories with:
-
QuickBooks item types
-
Revenue accounts
-
Link items by selecting one from each list and clicking Link. Click Unlink to remove.
When you are done, this tab should look like this:
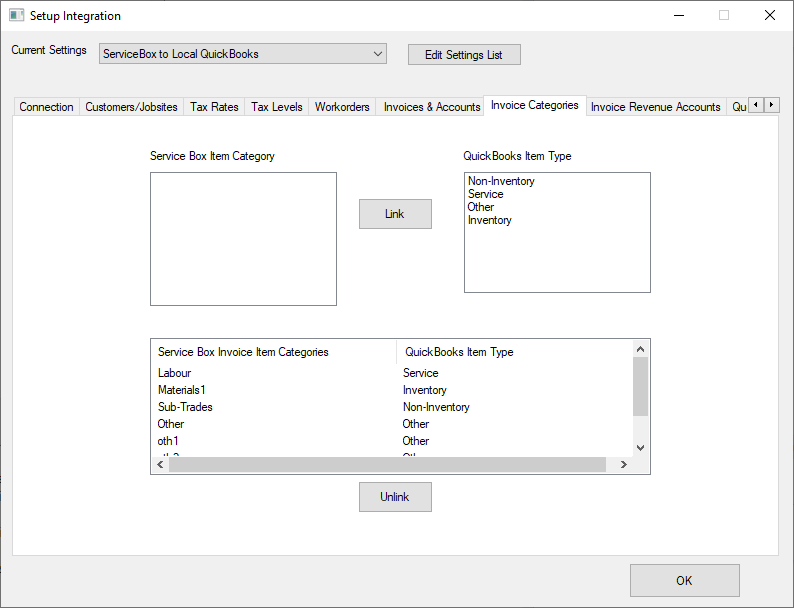
And this.
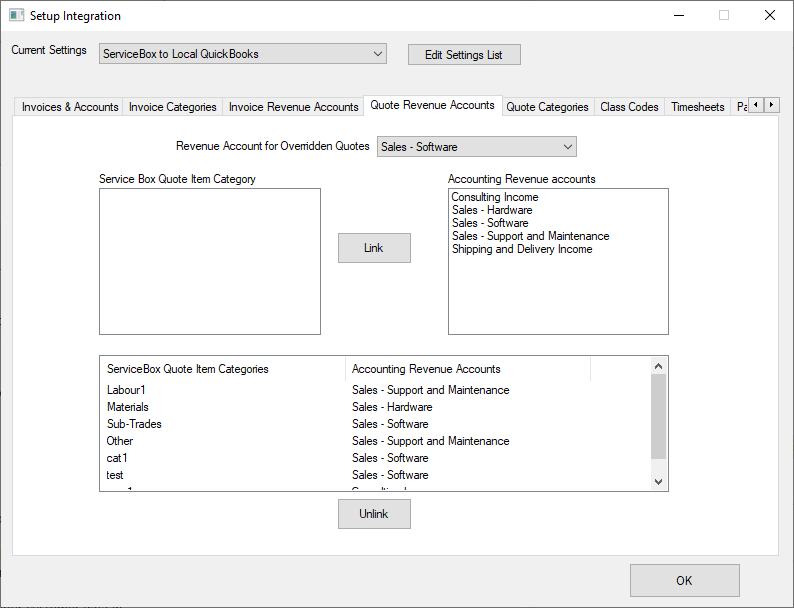
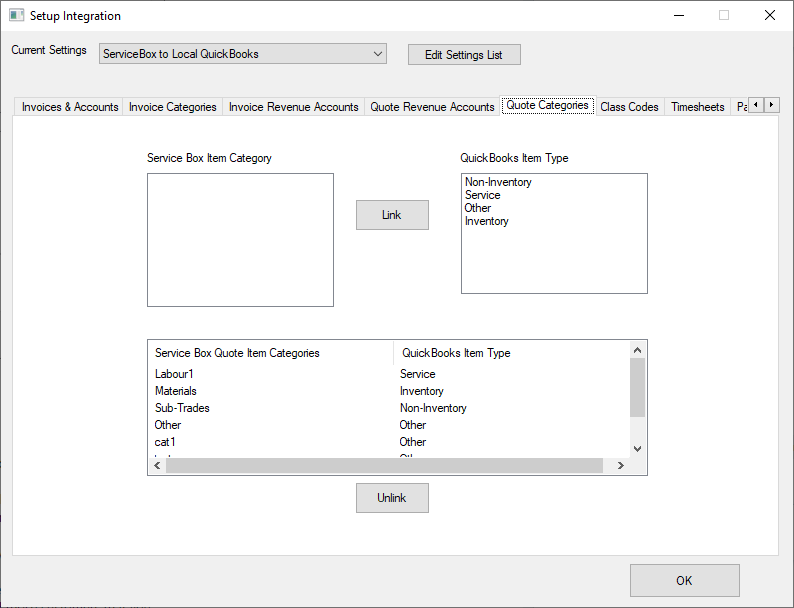
8. QuickBooks Only – Quote Category Mapping
When invoices are based on quotes:
-
Connector prorates quote amounts and may create new items.
Use this tab to link:
-
ServiceBox quote categories → QuickBooks item types & revenue accounts.
Same linking process as invoice categories.
When you are done, these tabs should look like this:
9. Final Tab – General Connector Settings
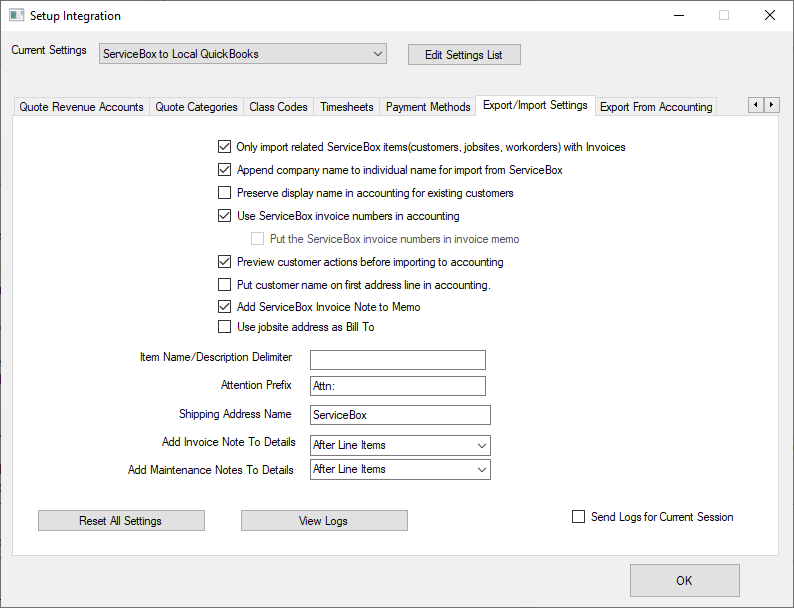
Add/Update customers from accounting to ServiceBox - This setting tells the connector to take new and updated customers from accounting and import them into ServiceBox. We do not recommend you turn on this setting for normal operations. If you are new to ServiceBox, however, you may want to turn this on for the first time you sync with ServiceBox to load your customer data. Once done with that, you can turn off the setting and simply maintain your customer data in ServiceBox
Select Customers Only - This setting is only available if the previous one is turned on. If you check this box, you can click on the ... button to select which customers to upload into ServiceBox. This allows you to only upload those customers that you are actively working with into ServiceBox.
Only import customers with invoices into accounting - Use this setting if you only want customers that have invoices in ServiceBox to be downloaded into accounting. This will allow to you minimize the amount of data you import into accounting to that data needed for invoices.
Append company name to individual name for import from ServiceBox - When customers that are marked as individuals are imported into accounting from ServiceBox, their 'name' in accounting is setup as their first name and last name '(eg. 'John Smith'). Use this setting if you'd like to add the company name on the customer record to the name to make it more unique in your accounting software (eg. John Smith - Google).
Use ServiceBox invoice number in accounting - This setting tells the connector to use the invoice number as it appears in ServiceBox as the invoice number in your accounting system. If you wish to just have your accounting software continue to assign invoice numbers incrementally, turn this setting off.
Put the ServiceBox invoice numbers in invoice memo - If you choose not to use the invoice numbers from ServiceBox, this setting will tell the connector to add the invoice number from ServiceBox into the memo field. We recommend having this setting set if you are not using the ServiceBox invoice numbers to allow for easy cross referencing between the two system.
Preview customer actions before importing to accounting - This setting will allow you to see what the connector will do with ServiceBox customers before changes are applied. This will give you a chance to approve adding new customers or linking customers between the new systems, before this happens. If a customer already has a link to a customer in your accounting system, these changes will always be applied.
There is also a checkbox on this tab labelled 'Send logs to Service'. This button is used for support purposes. When you have an error in the system and you contact support for ServiceBox, our support personnel may ask you to send the logs to them to aid in the diagnosis of the issue. Just check this checkbox and run sync and the logs will be sent. These log files only contain information used by the connector during the synchronization process.
Need Help?
If you have any questions or need support, please click the Help button in your ServiceBox account or email us at support@getservicebox.com.