
Summary
As Sage evolves, the Sage SDKs offered to third-party software like ours occasionally fall behind. Because we want our Sage customers to have all the features our other customers have, we've historically had to create our own systems to help access Sage in certain areas. One such integration allows us to post payments directly to Sage’s database.
This method is not officially supported by a Sage SDK (because no SDK currently exists for this feature), and with changes to their software, we’ve occasionally encountered situations where payments didn’t enter correctly, requiring users to manually fix errors.
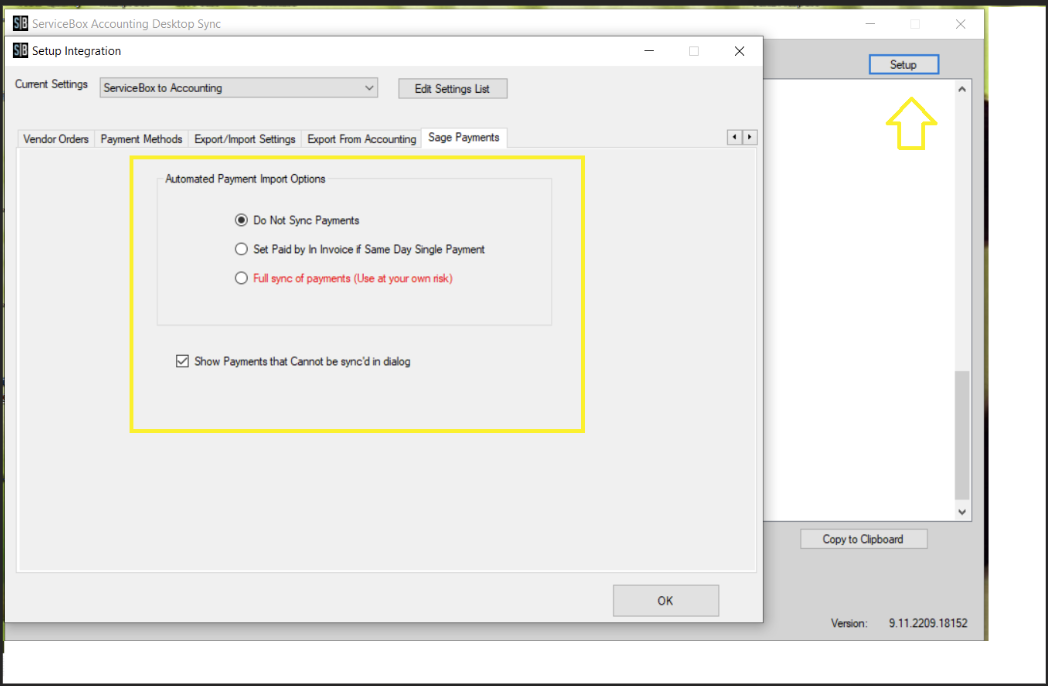
To improve the Sage 50 integration with ServiceBox Payments, we've added a Payment Options feature. This gives users more flexibility in how they enter payments into Sage. Users can choose from the following three options:
1. Do Not Sync Payments
This option allows Sage users to manually enter payment details into Sage for payments received in ServiceBox invoices.
How to Enable This Setting
Go to the Connector Program → Click on the Setup button in the top-right corner → Navigate to the Sage Payments tab → Select the first option: Do Not Sync Payments.
We recommend checking the checkbox at the bottom: Show Payments that Cannot be sync'd in dialog.
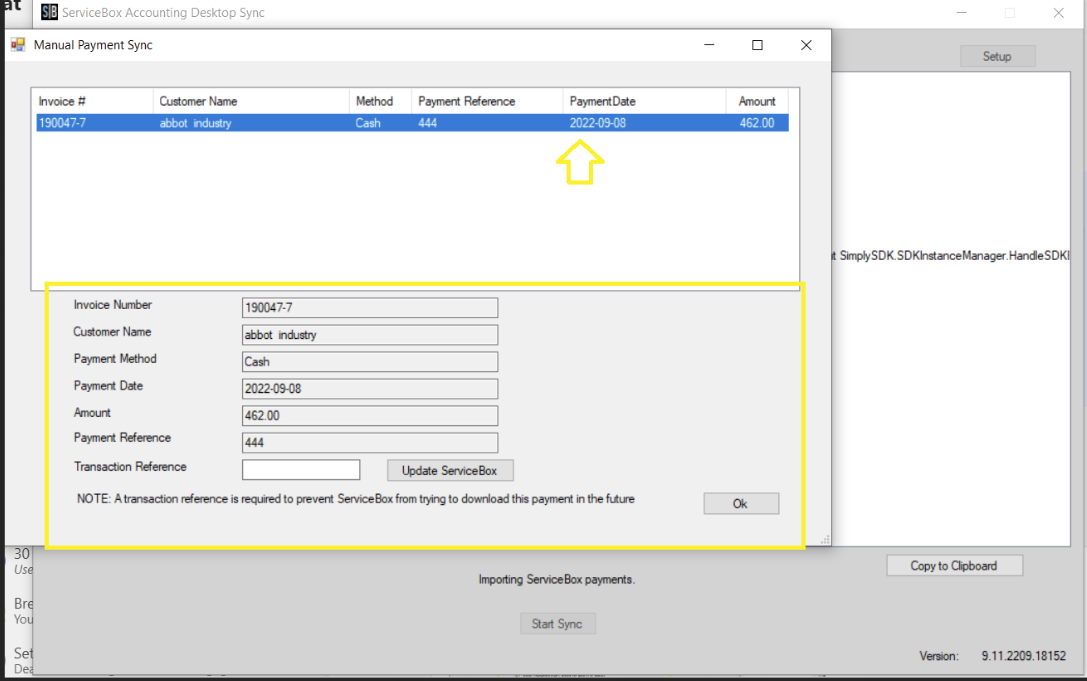
How to Use – Example
For example, let's consider invoice 190047-7. You've received the payment in ServiceBox.
With this setting, the user running the sync will see a list of paid ServiceBox invoices in a dialog box. This box includes details like Invoice Number, Customer Name, Payment Method, Payment Reference, Payment Date, and Amount. The user can then manually create receipts in Sage to avoid errors.
How to Run the Connector and Add Payments in Sage:
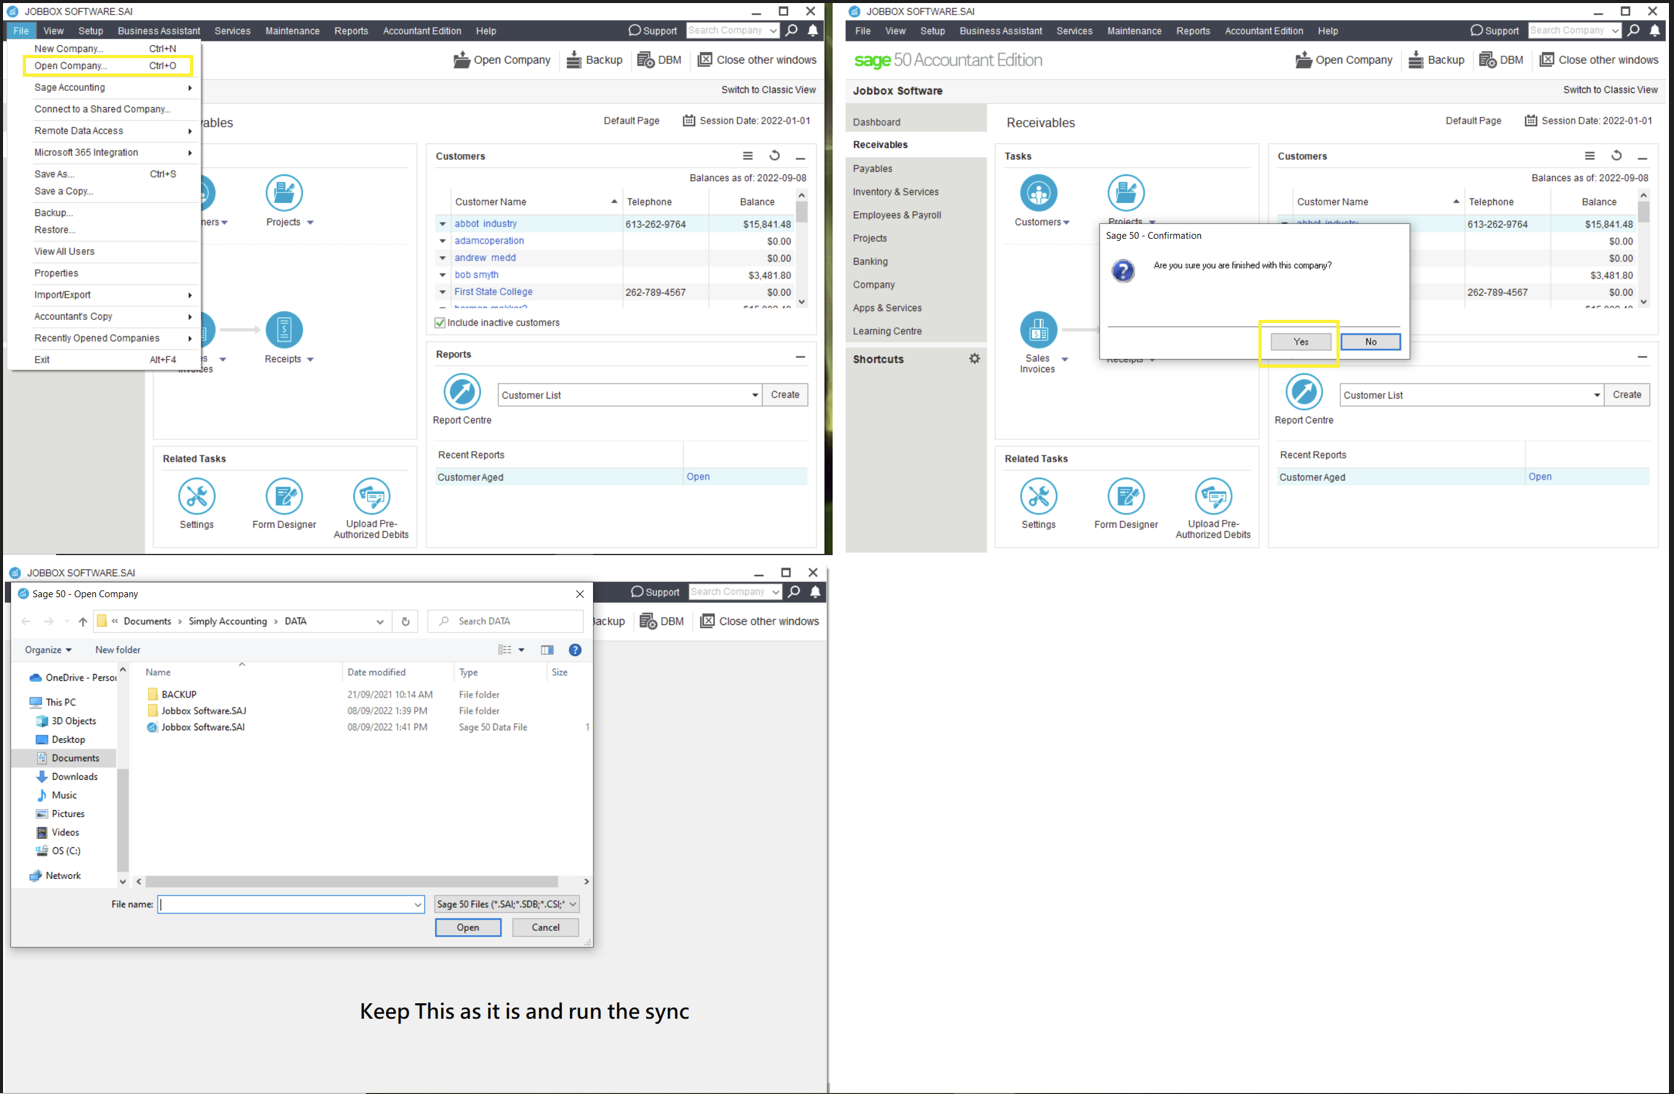
Step A:
-
Before you run the sync, open Sage.
-
Go to File > Open Company.
-
A dialog will appear: "Are you sure you are finished with this company?"
-
Click Yes and leave this screen open. Now, run the sync.
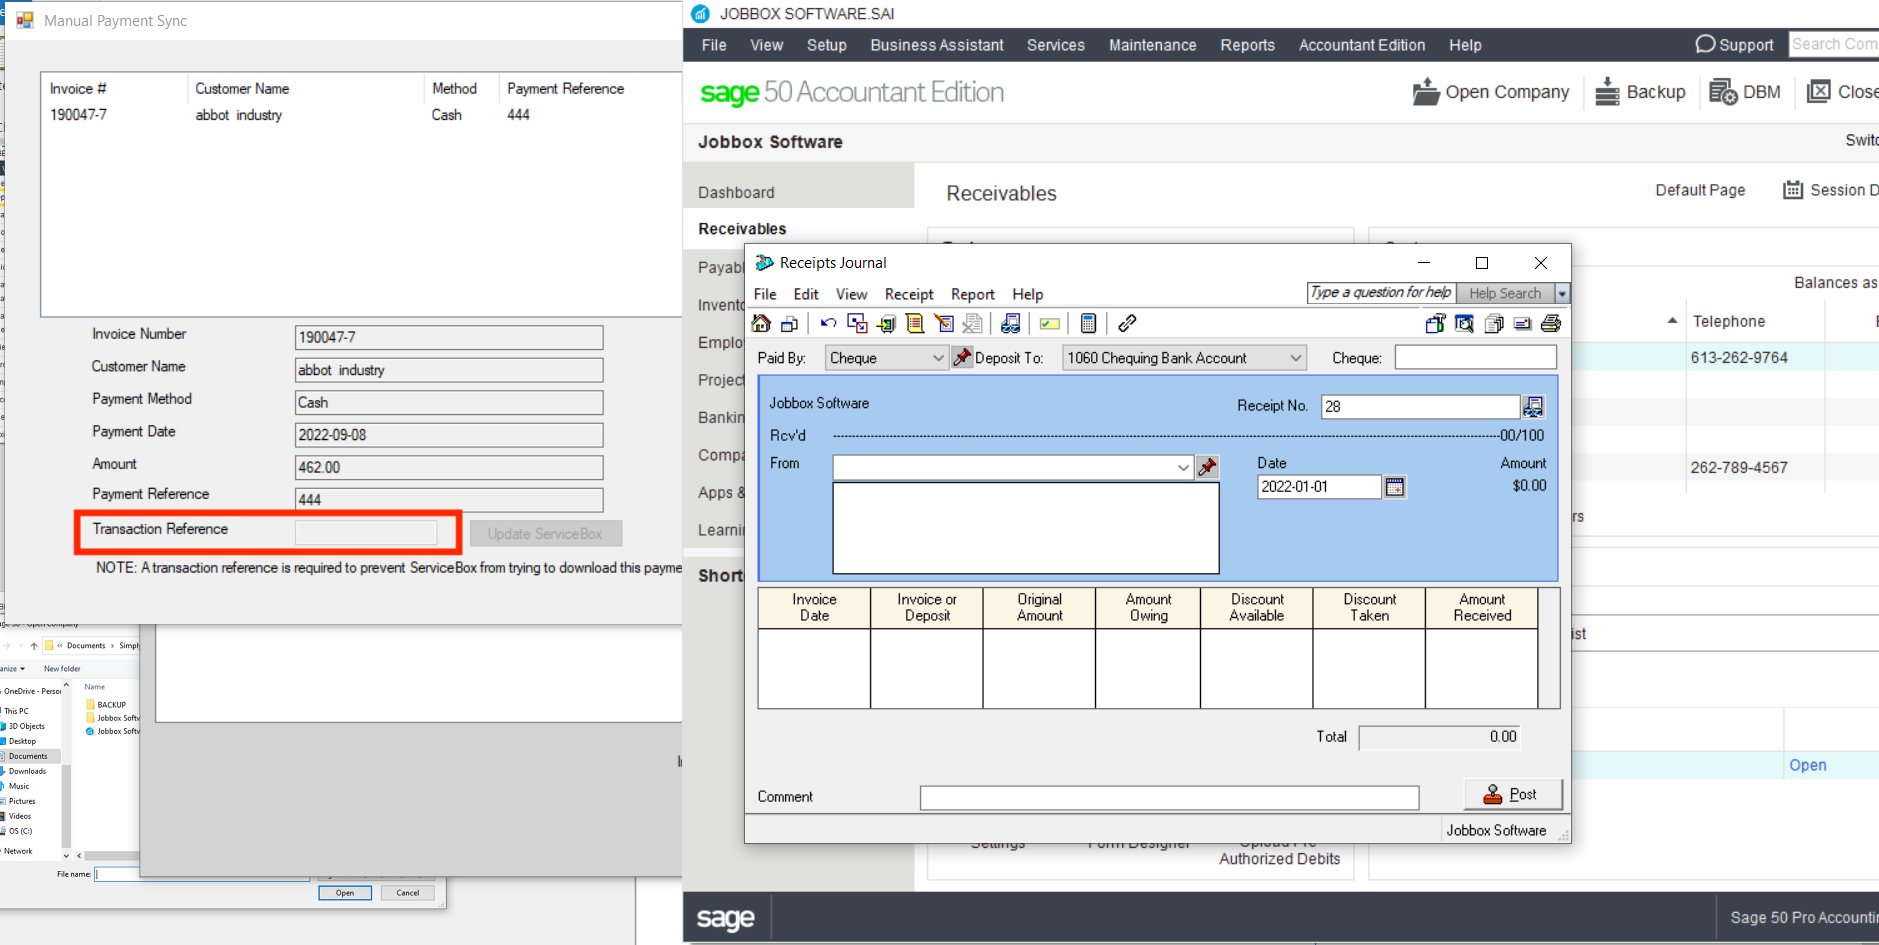
Step B:
-
In the sync dialog, select the invoice you want to create a receipt for. It will highlight in blue, and payment details will appear in the lower section.
-
Open Sage again by clicking Cancel on the Sage dialog.
-
Go to Receipts Journal and add the payment for the selected invoice.
-
We recommend entering the Sage receipt number in the Transaction Reference field on the left side of the connector program.
-
This field is optional but allows ServiceBox to track the payment in Sage and remove the invoice from the sync list.
-
Step C:
-
Once all receipts have been entered in Sage, close the Sage file as shown in Step A and allow the sync to complete by clicking OK in the connector program.
2. Set Paid by in Invoices if Same Day Single Payment
This option transfers payment information to Sage only for invoices where the invoice creation date and payment received date are the same.
If the dates do not match, users should manually enter those payments in Sage using the steps from Option 1: Do Not Sync Payments.
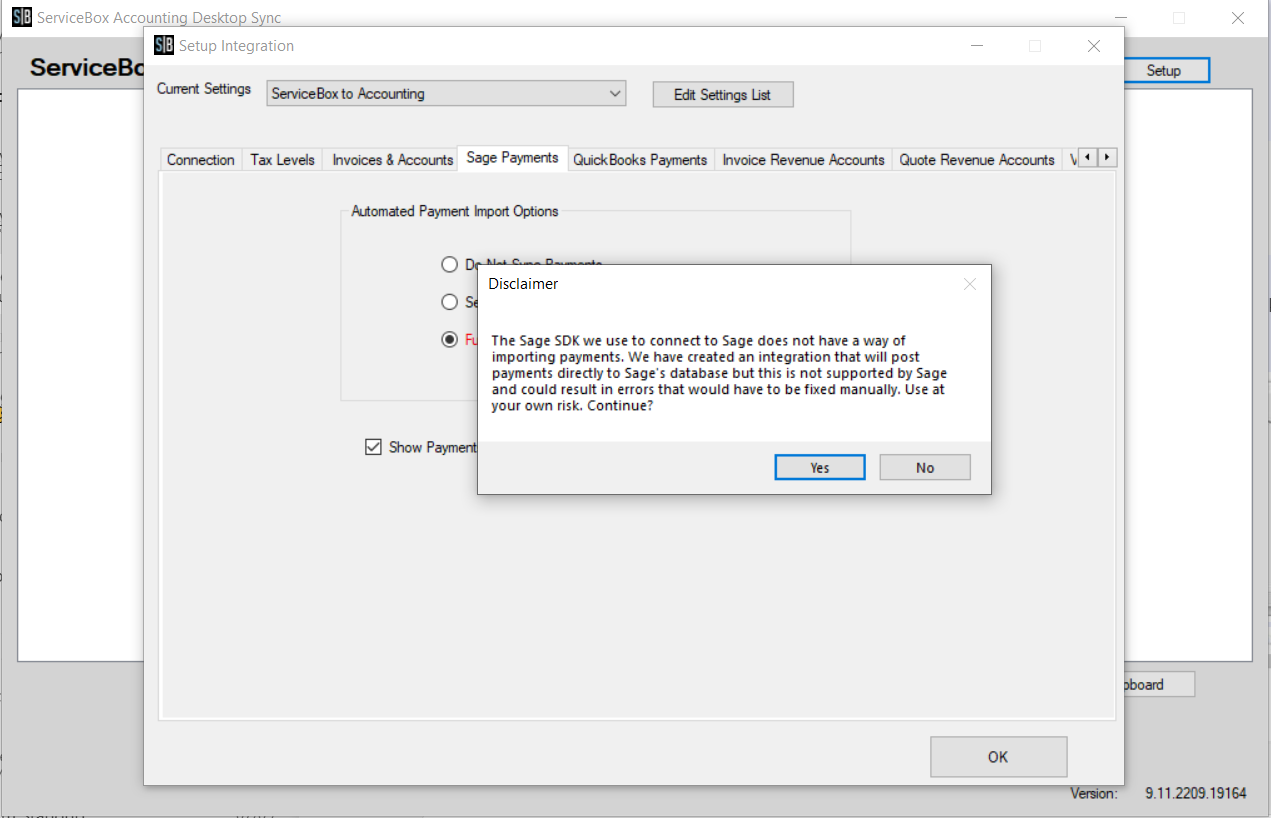
3. Full Sync of Payments (Use at Your Own Risk)
This option lets users run the payment sync as done historically. However, users must agree to a disclaimer acknowledging the risks.
This method is the easiest but also the most technically complex and potentially error-prone, due to Sage not officially supporting this type of integration.
Need Help?
Contact support by clicking the Help button in the bottom corner of your screen when logged in or email us at support@jobboxsoft.com.