
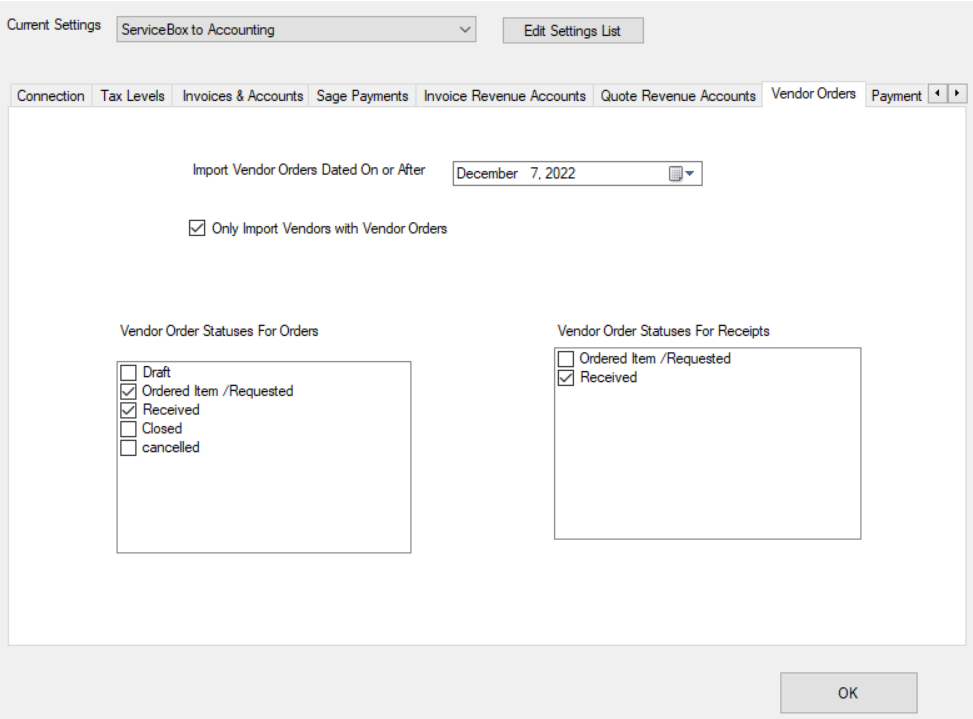
1. Import Vendor Orders Dated On or After
-
Select the date from which you want vendor orders to begin syncing.
-
For example, if you set the date to June 30th, 2026, only vendor orders created on or after this date will transfer.
-
You can change this date at any time to sync older or newer orders.
2. Only Import Vendors with Vendor Orders
-
When this option is checked, the Connector will only sync vendors that have vendor orders in ServiceBox.
-
Leave it unchecked if you want to sync all vendor profiles, regardless of whether they have associated orders.
3. Vendor Order Status for Orders
-
This setting determines which vendor order statuses will trigger the creation of purchase orders in your accounting software.
-
You must check both the following statuses:
-
Sent
-
Received
-
-
This ensures that purchase orders are available in QuickBooks before bills/receipts are created.
4. Vendor Order Status for Receipts
-
Select the Received status here to allow ServiceBox to generate a bill or receipt in QuickBooks once the vendor order is marked as received.
-
This step is essential for tracking received goods and corresponding expenses.
Need Help?
If you have any questions or need support, please click the Help button in your ServiceBox account or email us at support@getservicebox.com.