
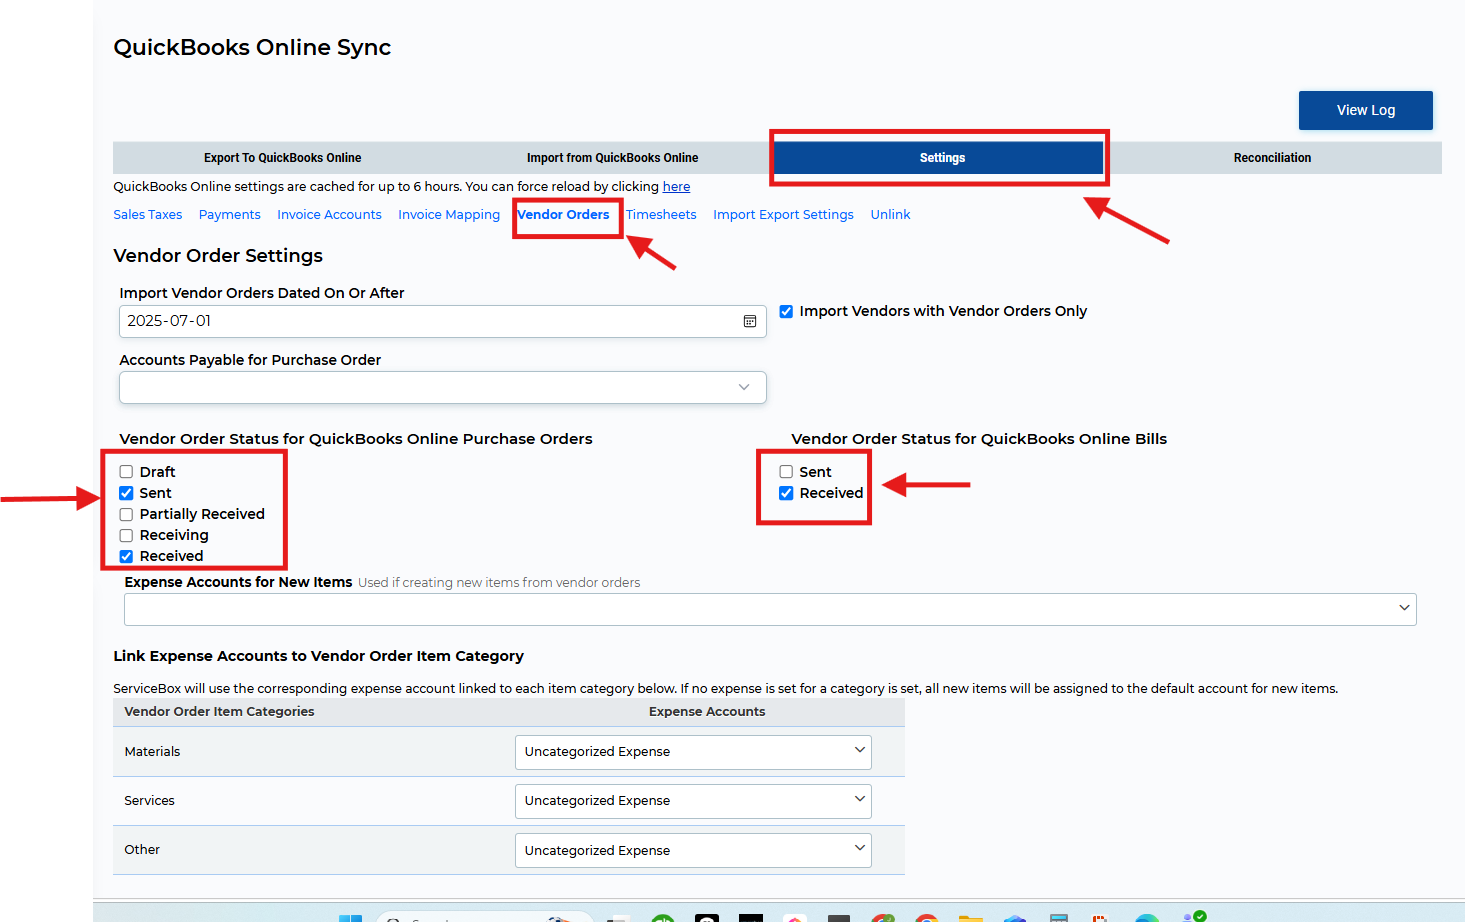
1. Import Vendor Orders Dated On or After
Set the date from which you want vendor orders to begin syncing to QuickBooks Online.
-
Example: If you choose January 16, 2023, only vendor orders created on or after this date will transfer.
-
You can update this date at any time to include earlier or later records, depending on your go-live timeline.
2. Import Vendors with Vendor Orders Only
Check this box if you only want vendors who have at least one vendor order to be imported into QuickBooks Online.
-
Leave it unchecked to sync all vendor records, regardless of whether they have associated orders.
3. Accounts Payable for Purchase Order
When a vendor order is synced to QuickBooks, the total amount owed is assigned to your Accounts Payable account.
-
Use this dropdown to specify which A/P account should be used, especially if you manage multiple accounts in QuickBooks Online.
4. Vendor Order Status for QuickBooks Online Purchase Orders
Select the vendor order statuses that should trigger the creation of a purchase order in QuickBooks Online.
-
You must select both the "Sent" and "Received" statuses.
-
This ensures that a purchase order is created before a bill can be generated for the same order.
5. Vendor Order Status for QuickBooks Online Bills
Choose the "Received" status to trigger the creation of a bill or item receipt in QuickBooks Online once the materials are marked as received in ServiceBox.
-
This step is required for complete and accurate expense tracking in QuickBooks.
Need Help?
If you have any questions or need support, please click the Help button in your ServiceBox account or email us at support@getservicebox.com.